Pages

Monday, June 30, 2014

Market Bag straps

Hey guys! When I was posting the Market Bag post, I was not completely finished with the straps, and I decided it would be too long of a pattern to combine it with the main bag post. I tried a few different options, and eventually settled on a tunisian crochet crossbody strap. In the process though, I made a few different patterns out of the different straps I tried. But, here's the strap patterns:

Strap Pattern

Notes

I have provided 2 patterns: one pattern for tote bag straps and another for a shoulder/crossbody bag. You could also put both on for a more versatile style.

You will work the beginning out of the top of the bag. Make sure the long edge of your strap does not line up with a seam in your top edge, as this will weaken the strap and possibly cause it to break.

Tote Bag Straps

8 hdc in side of bag. Continue until you have your desired length, typically 40 rows of hdc. Sl st end to side of bag approximately 1/4 of the way around.

Second strap- Start strap exactly opposite where you started your first strap. Follow instructions to end.

Shoulder bag strap

Regular weight-holding bag- 14 hdc in side of bag, continue in blo to create desired length.

Heavy-weight bag:

Regular crochet-16 hdc in side of bag, continue (NOT in back loop) to create desired length.

Tunisian crochet- I highly recommend this if you know how to do it. It creates a thick strap that works extremely well if you are actually going to take it to the farmer's market and load heavy fruits and vegetables into it. 15 Tss (basic Tunisian crochet) in top of bag, continue basic forward and returning pass to create desired length.

Hope you liked this posts, and don't forget to comment your thoughts! As always, thanks for visiting!

Analise

On Pinterest-analisehogan

On Ravelry-analisehogan


Thursday, June 26, 2014

World of Crochet: Tunisian Crochet

Hey guys! Recently I discovered the most amazing technique in crochet. I shouldn't even call it crochet, as it is about 50% crochet and 50% knitting. This is absolutely perfect for my about even knowledge of knitting and crochet. I just really enjoy crochet and feel much more comfortable with a crochet hook than knitting needles. But enough about me, and more about Tunisian crochet. Tunisian stitches are worked, again, half-and-half between crochet and knitting. You have a forward pass (where you work slip stitches into the top row of fabric and retain loops on your hook) and a return pass (where you work off stitches by yarning over and drawing through 2 loops at a time.) For your materials, you use a long hook (typically 9-15 inches long) with a ball on the end to prevent loops from slipping off. It requires no specialty yarn, though experienced crocheters recommend using 1-2 metric hook sizes larger than you would typically use. I am really sorry I can't share a pattern with you guys, as I got all my patterns from a book. However, you can check it out from your local library or buy it from Barnes & Noble here. It is amazing, with an inroduction to Tunisian crochet and its origins, along with beginner techniques and patterns.

The New Tunisian Crochet by Dora Ohrenstein

I really hope you guys check this book or another Tunisian crochet book out. I really feel this is a great craft for people that have just one or two problems that keep them from knitting or crocheting, as you will probably not have to deal with that problem in Tunisian crochet. Again, I never felt quite comfortable with knitting needles, and obviously that is taken care of in Tunisian crochet. I really hope you guys try this craft.

As always, thanks for visiting!

Analise

On Pinterest-analisehogan

On Ravelry-analisehogan


Wednesday, June 25, 2014

Market Bags!

Hey guys, so I know I had made a post about market bags before, but I actually finished a bag in that pattern a few hours after I posted it, and I was not happy with the result. I found that it was too narrow to really be anything except for its intended purpose, a market bag. So I created my own pattern that can really be manipulated to fit your needs and wants. This pattern uses half-double and double crochet, but you can create one with single and half-double or double and treble crochets if you like. These may require a different number of skeins, depending on how tight you crochet. So here goes:

Materials:

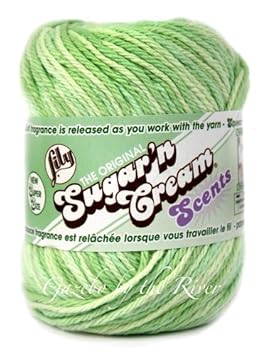
  • 2-3 skeins (depending on how tall you want your bag to be, I only used 2 skeins) Sugar'n Cream Fruit Punch (My New Yarn! Volume 3) or approximately 200 yards of variegated cotton yarn
  • 1 skein Sugar'n Cream Black Currant (My New Yarn! Volume 3) or approximately 75 of cotton yarn coordinating with your variegated yarn
  • Size "I" 5.5 mm hook
  • Applique (optional, but I will put a link to a super easy applique rose by Planet June at the bottom)

Skills

  • Half-double and double crochet
  • Crocheting in-the-round
  • Magic ring- this is a much better way to start crocheting in the round, as it has a much neater appearance than typical slip-stictched rings. Planet June has an awesome Magic Ring Tutorial and Videos to learn how to do this.

Pattern

Create Magic Ring, ch 3, 12 dc in middle (ch 3 does NOT count as a stitch)

Crochet 6 more rounds in typical crochet in-the-round instructions

Round 2- 2 dc in each st around. Join round with sl st.

Round 3- *2 dc in st, 1 dc in next st* around. Join round with sl st.

Round 4- *2 dc in st, 1 dc in next 2 sts* around. Join round with sl st.

Round 5- *2 dc in st, 1 dc in next 3 sts* around. Join round with sl st.

Round 6- *2 dc in st, 1 dc in next 4 sts* around. Join round with sl st.

Round 7- *2 dc in st, 1 dc in next 5 sts* around. Join round with sl st.


You will now be working in spiral. Do not join rounds, instead create a hdc in the top of the ch 3 from the previous round.

Ch 3. This counts as a dc. Ch 1 to create the "windowpane" look. You will skip a st with a ch, dc, sk st ch, around until you get back to the beginning. You will then place a hdc in the ch 3 of the round. Continue like this all the way around until you gt your deisred height.However, remember that you will be putting a 3-5 inch trim around the top. Remember to crochet in the chain, not in to the dc.

Note: If you find that you accidentaly did not create a ch after a dc, DO go into the top of the dc(s).


Top Trim

For my trim, I created a top of small granny squares. You can typically find a small, free granny square pattern online. I'm sorry I can't post my pattern, as I got it from a book, and book patterns are typically copyright. However, I have created a few tips for finding a good granny square

  • Make sure it is small. Try not to go larger than 5 to 5.5 inches square.
  • Look at the structure. Make sure it is not too lacy, and that it will support your bag.
  • Look at the design. If you are only doing your granny squares in one color, make sure it has a definite stitch pattern and that it will stand out, and not just look like a few rows of single crochet.
  • And remember, if you can't find a pattern that suits your fancy, just make your own! Try a tall and lacy stitch, like a treble crochet, crocheting simple squares and sewing them on in alternate directions, or try tiny diagonal dishcloths. It doesn't even have to be granny squares. Just crochet a strip in an eye-catching yarn or stitch!

The number of cranny squares you will need is dependent on how small they are. You will need more 3 inch squares that 5 inch ones.

Edit: If you do not like the look of granny squares, you can also make a long, narrow strip of Tunisian crochet.


Hope you guys like this post, and I will probably get some pictures on here soon. Thanks for visiting!

Analise

On Pinterest-analisehogan

On Ravelry-analisehogan


Friday, June 20, 2014

World of Crochet: Dtour Crochet Challenge

Hey guys! I know I usually feature my own work, yarns, etc. but I wanted to create a new type of post for this blog called World of Crochet. In these posts, we will look at the world of crocheting. These posts may include anything from awesome bloggers to a new product or a nationwide crochet event. Today, I am going to tell you about the Farm Dtour Crochet Challenge put on by Isabelle Garbani. She does knitting and crochet...but not with yarn! She works with mixed media to create unique pieces of art. This summer, as part of the Dtour trails display, she has asked crocheters from all over the world to make small leaves from plastic grocery sacks for the outdoor display. Also, everyone who participates gets a 5x7 print of the finished display!

This is a great contest, and the plastic "yarn" is super easy to make. I've already made about 10 leaves, even though I started only a few days ago and have been working on other proejcts in between the leaves.

You can learn about the installation, prizes, and how to make the thread and leaves here. I really hope you guys participate...even if you don't win, I find it a great challenge to crochet with a material other than typical yarn!


Hope you guys liked this type of post, if I don't get any negative feedback I will probably do another one soon! And as always, thanks for visiting!


Analise

On Pinterest- analisehogan

On Ravelry- analisehogan


Tuesday, June 17, 2014

My New Yarn! Volume 3

Hey guys! So I went to the craft store yesterday and bought some more yarn for a market bag (see my earlier post for that pattern) and the last color of yarn I needed for my upcoming pillow post! Here goes:


Caron United
I have mine in, obviously, white.
235 yards
Weight: 4
4 ounces
100% Acrylic


Lily Sugar'n Cream

I have mine in Black Currant (solid) and fruit punch

120 yards

Weight: 4 (medium)

2.5 ounces

100% cotton


Hoped you liked these yarns. The Multi-colored cotton is already turnng out great in my market bag, and once I am finished with the bag (I plan to use the solid purple for the handles) I'll post the picture to my Market Bag post! But for now, thanks for visiting! If you have any questions, please comment below!


Analise

On Pinterest-analisehogan

On Ravelry-analisehogan


Thursday, June 12, 2014

Working in the round+Beanies!

Hey Guys! Today I'm going to show you how to do an important skill in crocheting...crocheting in the round! I used bullky yarn for my first in-the-round project, and it really helped me to see all the stitches, so now I'm recommending it to you! I used my Bravo BIg (My New Yarn! Volume 1) and a size N 9 millimeter hoook. I am also really, really sorry that I don't have pictures as we go along, but to make up for that, I will provide the clearest instructions that I can.


1) Ch. 10. Sl st ends together to frm circle.

2) Ch. 3. Dc 11 into center of formed circle. Make sure your stitches are not overlapping and creating a new row!

3) Sl st the top of your ch. 3 and your last dc together.

4) Ch. 3. This counts as 1 dc.

5) In the next st, crochet 2 dc. In the next, 1 dc. In the next, 2 dc. Continue alternating all the way around.

6) Ch.3. Instead of putting 2 dc in every other st, we will now do 1 dc in st, 1 dc in st, 2 dc in st, 1 dc in st and so on

7)Ch3. Now we will do 3 1 dc in each stitch when we do2 dc in each st.

8)DO you see where I'm going with this? In every round, you increase the "1 dc in st" in the 1 dc in st to 2 dc in st ratio by 1,if that make sense.

I hope you understand my instructions, and let's get to making a beanie!

Bulky Yarn Beanie

Yarn- Schachenmayr Bravo Big- Preferably in a neon color

Hook- Size N

Notions- Large Yarn Needle

1) Repeat instructions 1-6 above.

2) Now, instead of doing 2 dc in some sts, we will only do 1 dc in all sts.

3) Do 4-6 rounds, and finish off.

4) Sew ends in with your yarn needle.

Done!

Roll the cuff up...


...or not!


Hope you liked this post, even if it wasn't the clearest. And as always, thanks for visiting!


Analise

On Pinterest-analisehogan

On Ravelry-analisehogan


Wednesday, June 11, 2014

Hats

Hey guys! So yesterday I went to Loops yarn store (link on the sidebar to their website) and had a crochet lesson. It was great, and I found out that you can make a beanie-type hat...without working in the round! IF you are wondering how it is made into a hat, even though it is not in the round(I sure was!), please check out the "Finishing" instructions. I thought it was a really creative pattern, and I wanted to share it. So, here goes:

Mountain Toque
Designed by Sherri Torrez

Yarn- 1 Schachenmayr Bravo Big (see My New Yarn! Volume 1) or other Super Bulky weight yarn
Hook-Size N or P
Notions- XL Yarn Needle
Gauge- 6 sc=4"

ch-chain, st-stitch, single crochet, BLO-back loop only
Instructions for cuffed toque are in parentheses, instructions for non-cuffed are not

Ch 21(27)

Row 1: Sc in 2nd ch from hook and in each ch to end. 20 sc(26 sc)
Row 2: Working in BLO, sc in 1st st and in each st to end. 20 sc(26 sc)
Rows 3-26: Repeat row 2,

Finishing

Fold finished piece in half, holding top and bottom edges together. Join stitch for stitch by making a slip stitch through BLO of final row and corresponding stitch of beginning row to the end. CH1, cut yarn leaving a 10 inch tail for drawing together the top of the hat. Pull the end of the yarn out of the final loop and using your large needle run the yarn through the edge of the hat creating a drawstring all the way around to where the yarn tail begins. Draw the yarn tight and secure it wiht a couple of whip stitches. Weave in ends. Turn hat right side out (and turn up bottom edge to form cuff.)

Hoped you liked this pattern. Sometime soon, I hope to start posting about a major skill in crocheting...crocheting in the round! In the meantime, please comment if you would like me to post about a specific skill, stitch, or project. Thanks for visiting!

Analise
On Pinterest-analisehogan
On Ravelry-analisehogan


Tuesday, June 10, 2014

Yarn Bowls and Winding Yarn

A
A
il_570xN.320917731.jpg     Hey guys! I recently found a really cute flowerpot...but didn't have any plants to put in it! So rather than let it go to waste and sit in my closet, I found a great use for it: as a yarn bowl!
     Yarn bowls are typically used for holding the yarn (to prevent it from rolling around) and preventing it from tangling (by controlling the "flow" of the yarn, for lack of a better word.) Although many people say they are unnecessary, even frivolous, you can't argue they do a good job of containing your yarn. The options for a yarn bowl are limitless, and it doesn't actually have to be specified as a "yarn bowl." You can use a an actual yarn bowl, with a slit in the side, or a planter, like I did, but here are some pretty creative (and cheap!) alternatives:
  

The owl design is sooo cute!
A lip keeps the yarn from flying out
  • Large Tupperware containers with a hole punched in the lid
  • Milk Crates are great if you have a few different yarns you are regularly working with in your project: a large size and many holes make this an inexpensive replacement
  • A glass bowl with a binder clip attached: Simply thread your yarn through the top of the clip!


But of course, if you are going to keep a yarn bowl, you must keep your yarn in balls (because yarn growing out of an owl's head is not exactly, well, what you would call attractive.)

Winding Yarn
1)Wind yarn approximately 20 times around index and middle fingers


2) Pull off fingers and wrap yarn around middle of loops, creating a bow shape.


3) Pinch together both sides of bow and continuing wrapping yarn around until it is in a ball.
A

Hope you liked this, I will post a picture soon of all my wound balls of yarn. And as always, thanks for visiting!


Analise
On Pinterest-analisehogan
On Ravelry-analisehogan


My New Yarn! Volume 2


Hey guys! I recently found an amazing color combo, and I thought, why not crochet something in the colors? I am planning to make a pillow, but first, let me introduce you to the yarns. (By the way, the colors are a light sea foam green, light coral, navy blue, and cream...beautiful!)


Caron Simply Soft
I have mine in Soft Green, Persimmon, and Off White
315 yards
Worsted
6 ounces
100% Acrylic
The first pic is soft green...I'm sorry you can't really tell, it is a truly beautiful color! :(


Caron UNITED
I got mine in Navy
235 yards
Worsted
4 oz.
100% Acrylic


I'm sorry that some are wound in to balls and some are not, but please forgive me!
And in case you were wondering, it IS my Lily Sugar'n Cream yarn that I used in my Diagonal Dishcloths and mentioned in My New Yarn! Volume 1. They turned out great and have an amazing texture, great for scrubbing, thanks to the back loop aspect.

I will be posting on my pillow project soon, but until then, thanks for visiting!

Analise
On Pinterest-analisehogan
On Ravelry-analisehogan

Diagonal Dishcloths!

Hey guys! I recently finished some nice dishcloths, and they turned out great! I did get this from someone else (I'll put the link below) and I did modify the pattern a bit to make it not as big. Here goes:

ch-chain, sc-single crochet, inc-increase, dec-decrease (see the Button Up Coffee Cozy for more details on increasing and decreasing)


  1. ch 3, turn.
  2. Rows 2-30: inc on first st, sc through row, inc on last stitch.
  3. Rows 31-60: dec on first two sts, sc through row, dec on last 2 sts.
  4. ch 10, cut yarn, make loop with ch.
I know this a short post, but I will probably post again today, so for now, bye! And as always, thanks for visiting!

Analise

On Pinterest-analisehogan
On Ravelry- analisehogan
Ananda's Diagonal Dishcloths


Monday, June 09, 2014

Improvising Patterns and Button-Up Coffee Cozy

Hey guys! I know I just recently posted, but I just finished my first improvised project, and I'd like to share some tips for improvising and my own improvised pattern.

Tips for Improvising

  • It's OK to loosely base your pattern on somebody else's...but give them credit if you copy more than about 50% of their ideas!
  • It's OK to mess up!
  • Make sure you really know the stitches you are planning to use
  • Make sure you have all your equipment
  • Even if you see something on the web that's similar to your design, it's OK to take credit for yours...IF it is yours and yours alone!

Button-Up Coffee Cozy
This is a great gift for dad. I used Impeccable Ombres (see my Ravelry stash for more details on that yarn) and a wood button to create a masculine look for my dad.
KEY
My improvised pattern!!!
Ch-chain, Sc- single crochet, Sc2tog- single crochet 2 stitches together, st- stitches
Beginning
  1. Ch 3.
  2. Sc in 2nd ch from hook, 1 more sc
  3. Ch 1, turn. Sc 2 in each existing sc.
  4. Ch 1, turn. Sc in each existing sc.
  5. Ch 1, turn. 2 sc in first sc, sc to end of row, 2 sc in end stitch
  6. Ch 1 turn. Sc in each existing sc.
  7. CH 1, turn. 2 sc in first sc, sc to end of row, 2 sc in end stitch
  8. Continue until your row is 14 sc across.
Main Section
  1. Ch 3, turn. Sc to end of row.
  2. Sc approximately 30 rows or until desired length is achieved (remember we still have to decrease down to a point again.)
Ending
  1. Sc2tog at beginning of row, sc to last 2 st, sc2tog.
  2. Continue alternating between a decreasing row and a row that stays the same number of sts until. you have only 2 sts left.
The Button
  1. Cut a long tail of yarn at end of project.
  2. Use tail from beginning of project and yarn needle to thread a button and secure it.
  3. Use end tail to create a loop, tie a knot, and use a yarn needle to thread ends into project.
  4. Button it up, and enjoy your gift!
Hope you liked my project, and don't forget to say thanks to your dad!

Analise
On Pinterest-analisehogan
On Ravelry-analisehogan

My new yarn! Volume 1

Hey guys! After I posted yesterday, my grandmother offered to take me to the craft store to get yarn to make things for my dad for Father's Day and for my mom for her birthday in a month. I got some great yarn, and I have already started on my dad's project. I hope to introduce you to more yarns and help you avoid not-so-great ones. Here they are:

1) Lily Sugar'n Cream Scents (it doesn't really smell like anything)
I got mine in Aloe Vera
It has approximately 95 yards.
4-ply
2 oz. per skein
100% cotton


2) Schachenmayr Originals: Bravo Big
I got mine in Color 154, Royal
It has approximately 131 yards.
10-ply
7 oz. per skein
100% Acrylic


3) Loops & Threads: Impeccable Ombre
I got mine in Earth
It has approximately 192 yards.
4-ply
3.5 oz. per skein
100% acrylic


I hoped you liked this, and I hope to be acquiring some new yarn soon. I may have another project post out today, but if I don't it will certainly come tomorrow. After I have done some projects with these yarns, I will inform you on how well they work for me. I'm sorry I couldn't find a picture of a skein of the Bravo Big, but I hope it doesn't hinder you too much. Until next time, thanks for visiting!

Analise


Sunday, June 08, 2014

Intro/Knotted Headband

     Hey guys! I wanted to start a crocheting blog for the summer as I will be going on lots of trips and having lots of free time in cars, planes, etc. and really wanted to take crocheting up as a hobby instead of just a few projects here and there.I have just begun crocheting, so my projects will be simple at first and more complicated as we go along. If you are also just beginning to crochet, great! Crocheting is a great craft to get into. Also, if you are just starting, I encourage you to get an account on Ravelry.com. It is an online community of knitters and crocheters, and has awesome, (mostly) free patterns that range from first time projects to patterns for people with years of experience. And again, if you are beginning crocheting, that's awesome! The skills for crocheting will last you a lifetime.

     To start off, I found this awesome pattern on Ravelry. It is a knotted head band project, found on All About Ami (link to her blog below). What I love is that it is worked horizontally, so your beginning chains are the circumference of the headband, so you can make it as thick or as thin as you want.

Knotted Headband
Ch-chain, dc- double crochet, st cl-stitch closed

  1. Ch 70
  2. Insert hook in 4th ch from hook, dc
  3. dc to end of row
  4. ch 3, turn, dc to end of row (continue till desired width is achieved)
  5. st cl with yarn needle to create circle
  6. Pinch headband (pinched section should be aprox. 2 inches across, sew pleats in with yarn needle
Knot

  1. Ch 10
  2. Insert hook in 4th ch from hook, dc to end of row
  3. ch 3, turn, dc to end of row
  4. Continue until you have 4 or 5 rows of dc
  5. sl cl around pleated section of headband with yarn needle
Thanks for visiting Simple Crochets,

Analise

To find this pattern on All About Ami, click Patterns at the top and scroll down until you find the Knotted Headband-All About Ami