Hey guys, so I know I had made a post about market bags before, but I actually finished a bag in that pattern a few hours after I posted it, and I was not happy with the result. I found that it was too narrow to really be anything except for its intended purpose, a market bag. So I created my own pattern that can really be manipulated to fit your needs and wants. This pattern uses half-double and double crochet, but you can create one with single and half-double or double and treble crochets if you like. These may require a different number of skeins, depending on how tight you crochet. So here goes:
Materials:
- 2-3 skeins (depending on how tall you want your bag to be, I only used 2 skeins) Sugar'n Cream Fruit Punch (My New Yarn! Volume 3) or approximately 200 yards of variegated cotton yarn
- 1 skein Sugar'n Cream Black Currant (My New Yarn! Volume 3) or approximately 75 of cotton yarn coordinating with your variegated yarn
- Size "I" 5.5 mm hook
- Applique (optional, but I will put a link to a super easy applique rose by Planet June at the bottom)
Skills
- Half-double and double crochet
- Crocheting in-the-round
- Magic ring- this is a much better way to start crocheting in the round, as it has a much neater appearance than typical slip-stictched rings. Planet June has an awesome Magic Ring Tutorial and Videos to learn how to do this.
Pattern
Create Magic Ring, ch 3, 12 dc in middle (ch 3 does NOT count as a stitch)
Crochet 6 more rounds in typical crochet in-the-round instructions
Round 2- 2 dc in each st around. Join round with sl st.
Round 3- *2 dc in st, 1 dc in next st* around. Join round with sl st.
Round 4- *2 dc in st, 1 dc in next 2 sts* around. Join round with sl st.
Round 5- *2 dc in st, 1 dc in next 3 sts* around. Join round with sl st.
Round 6- *2 dc in st, 1 dc in next 4 sts* around. Join round with sl st.
Round 7- *2 dc in st, 1 dc in next 5 sts* around. Join round with sl st.
You will now be working in spiral. Do not join rounds, instead create a hdc in the top of the ch 3 from the previous round.
Ch 3. This counts as a dc. Ch 1 to create the "windowpane" look. You will skip a st with a ch, dc, sk st ch, around until you get back to the beginning. You will then place a hdc in the ch 3 of the round. Continue like this all the way around until you gt your deisred height.However, remember that you will be putting a 3-5 inch trim around the top. Remember to crochet in the chain, not in to the dc.
Note: If you find that you accidentaly did not create a ch after a dc, DO go into the top of the dc(s).
Top Trim
For my trim, I created a top of small granny squares. You can typically find a small, free granny square pattern online. I'm sorry I can't post my pattern, as I got it from a book, and book patterns are typically copyright. However, I have created a few tips for finding a good granny square
- Make sure it is small. Try not to go larger than 5 to 5.5 inches square.
- Look at the structure. Make sure it is not too lacy, and that it will support your bag.
- Look at the design. If you are only doing your granny squares in one color, make sure it has a definite stitch pattern and that it will stand out, and not just look like a few rows of single crochet.
- And remember, if you can't find a pattern that suits your fancy, just make your own! Try a tall and lacy stitch, like a treble crochet, crocheting simple squares and sewing them on in alternate directions, or try tiny diagonal dishcloths. It doesn't even have to be granny squares. Just crochet a strip in an eye-catching yarn or stitch!
The number of cranny squares you will need is dependent on how small they are. You will need more 3 inch squares that 5 inch ones.
Edit: If you do not like the look of granny squares, you can also make a long, narrow strip of Tunisian crochet.
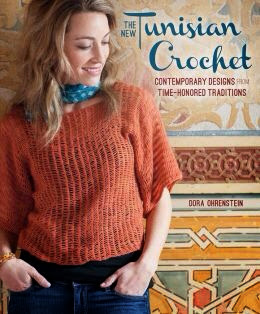
Hope you guys like this post, and I will probably get some pictures on here soon. Thanks for visiting!
Analise
On Pinterest-analisehogan
On Ravelry-analisehogan
 Posted with Blogsy